Use the image annotation to mark special features in your images and store them in a report (PDF).
Where can I find the Image annotation?
1) Open a project.
2) Open the Image annotation function.
3) Select the photo to be edited by setting a check mark. (Note: If no photos are stored yet, add georeferenced images as project files in the project first).
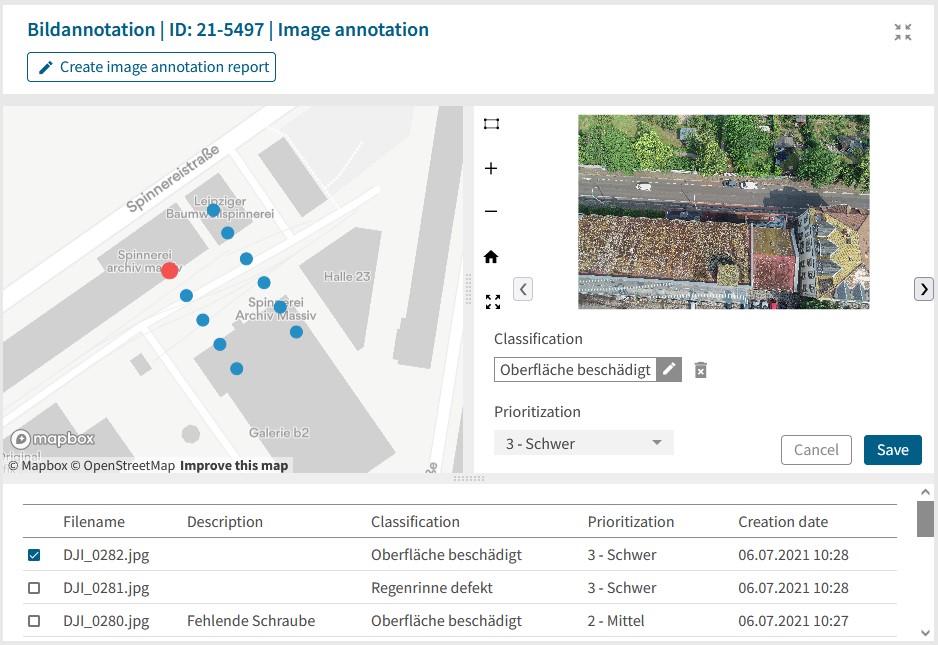
Use the following tools:
A: Set markers on the image for special features.
B: Enlarging, reducing, and resetting the image position.
C: Switch to full screen mode for better editing.
D: Classify the special feature on the image. Create your own classifications in your settings.
E: Prioritization of the special feature. Create your own categories in your settings.

4) Click Save to finish. Designations, classification and prioritization is stored in the list.
5) Click Create image annoation report and get all information summarized.